

Custom email templates
Scalekit uses default templates to send authentication emails to your users. You can customize these templates with your own branding and content to provide a consistent experience.
Find these templates in Emails > Templates.
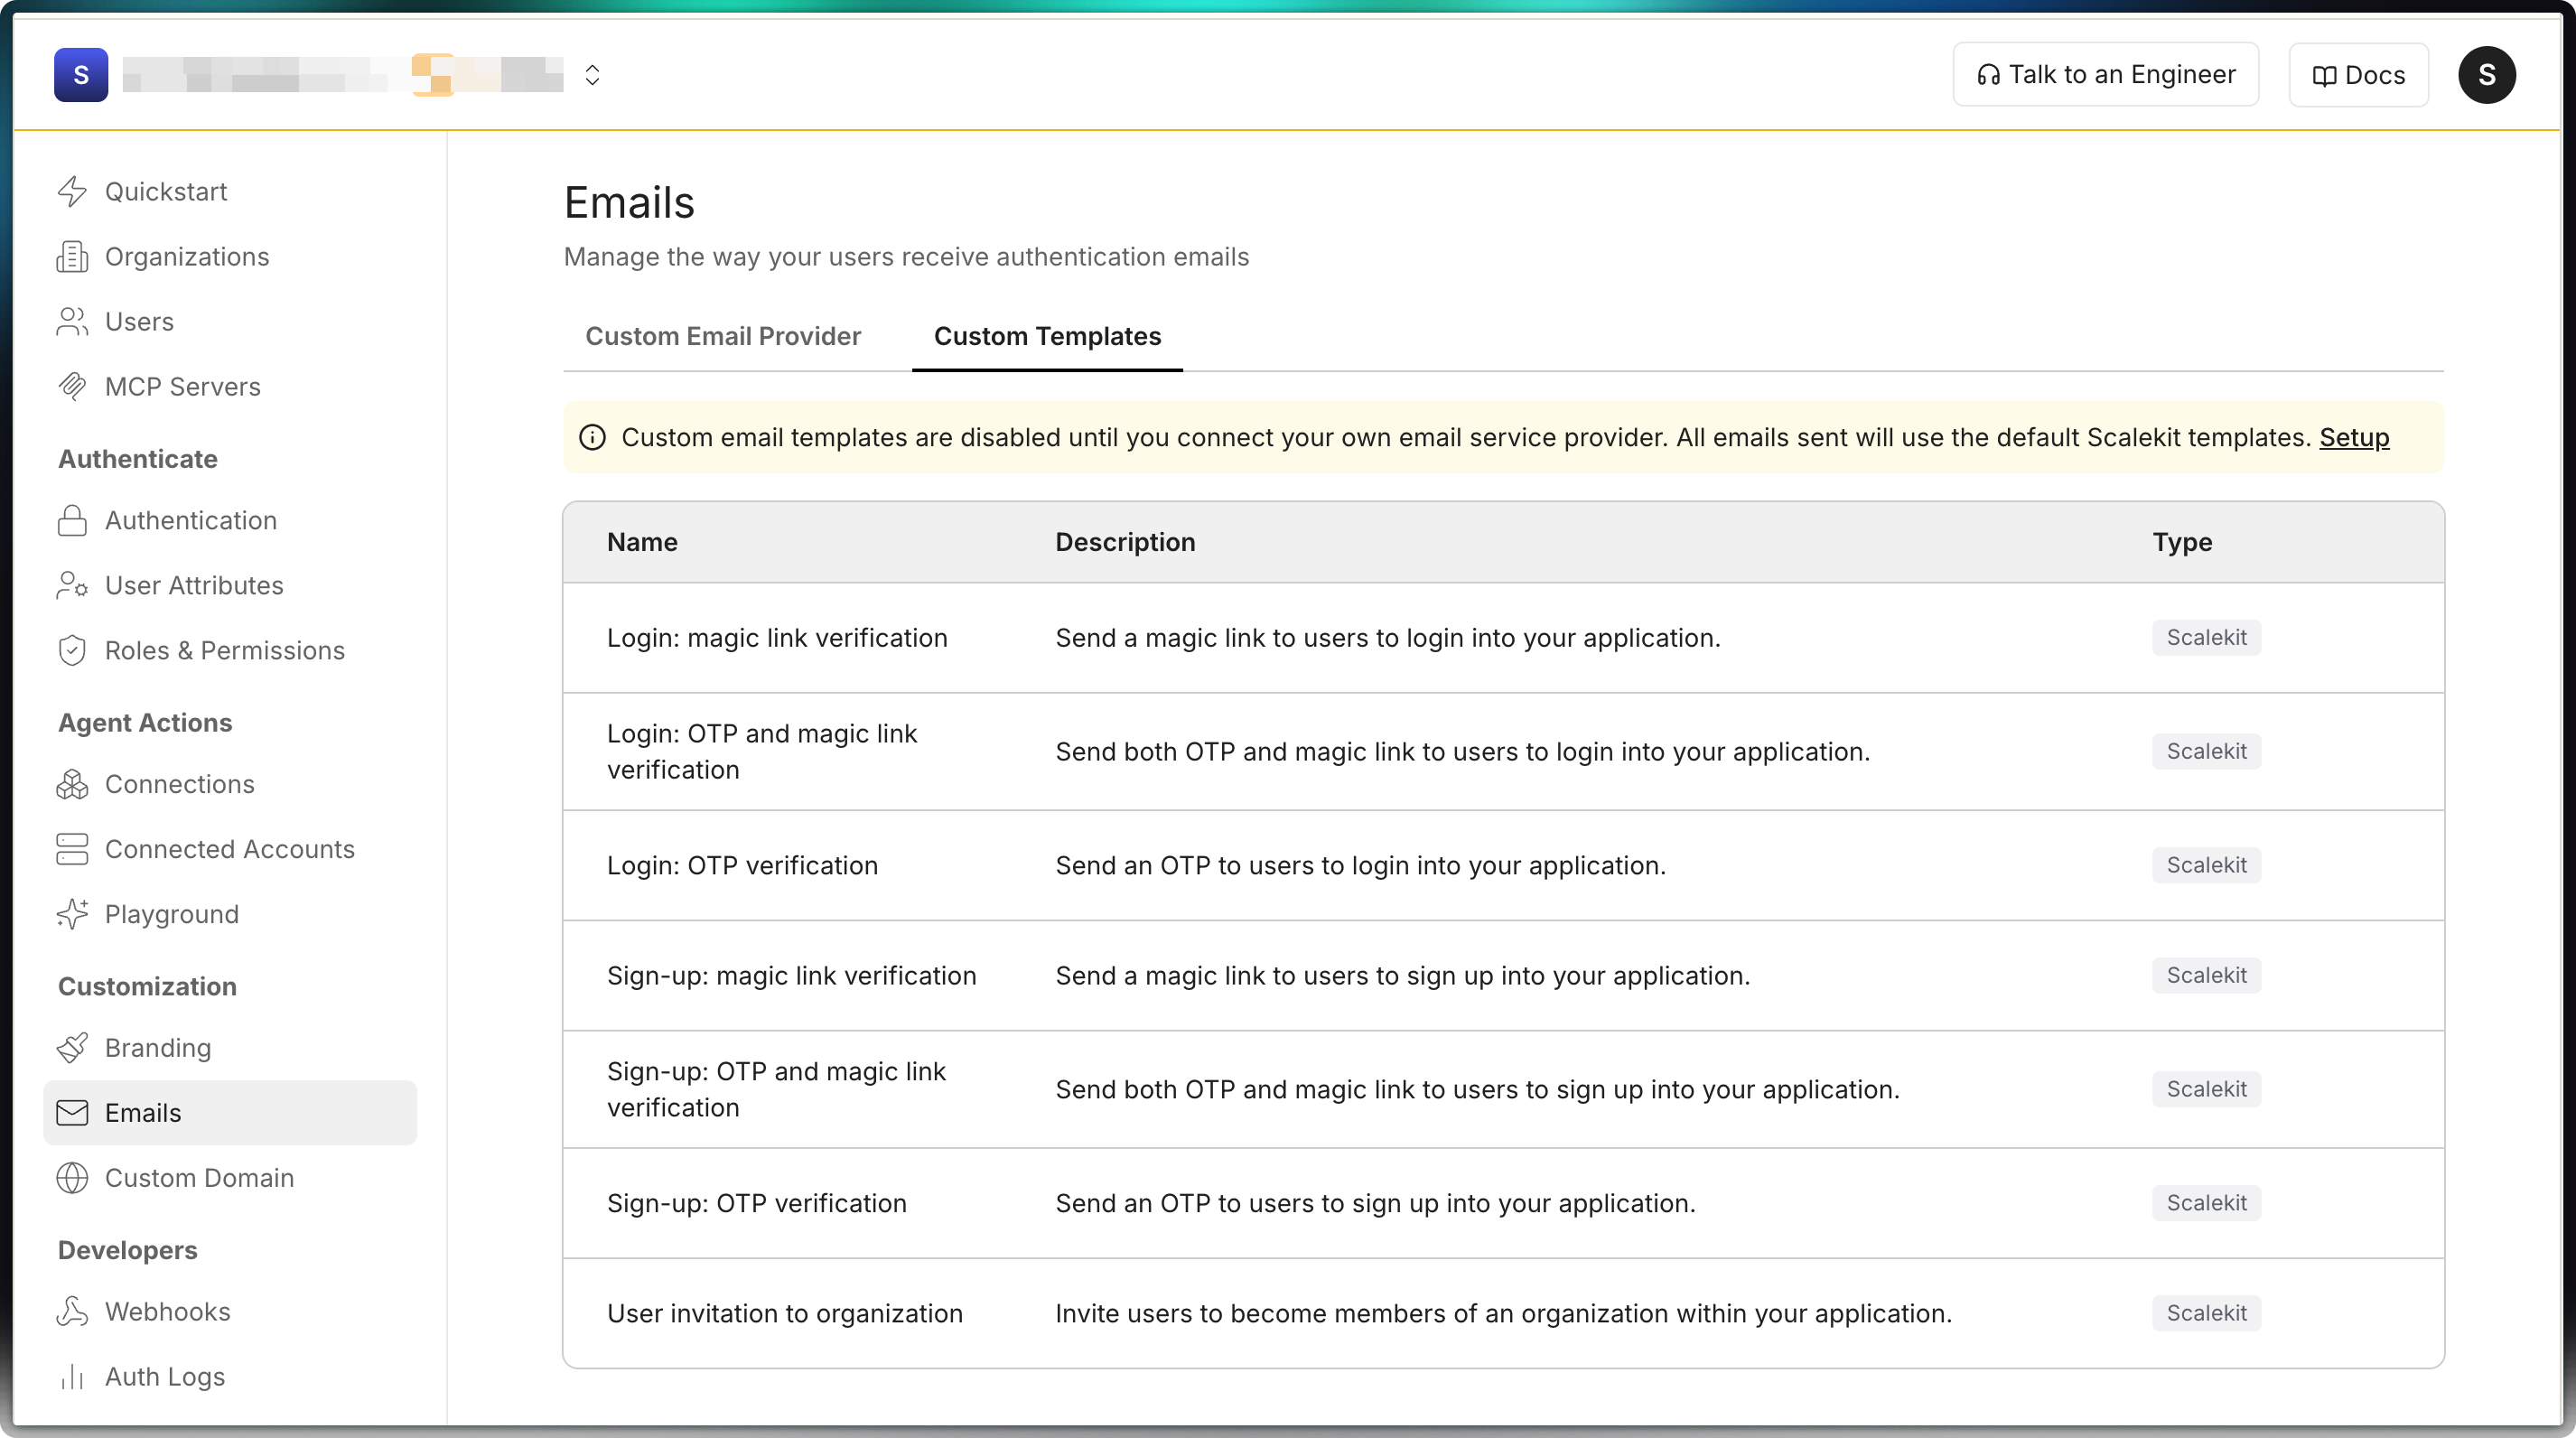
Select one of the listed templates and choose between Scalekit’s default templates or your own custom templates.
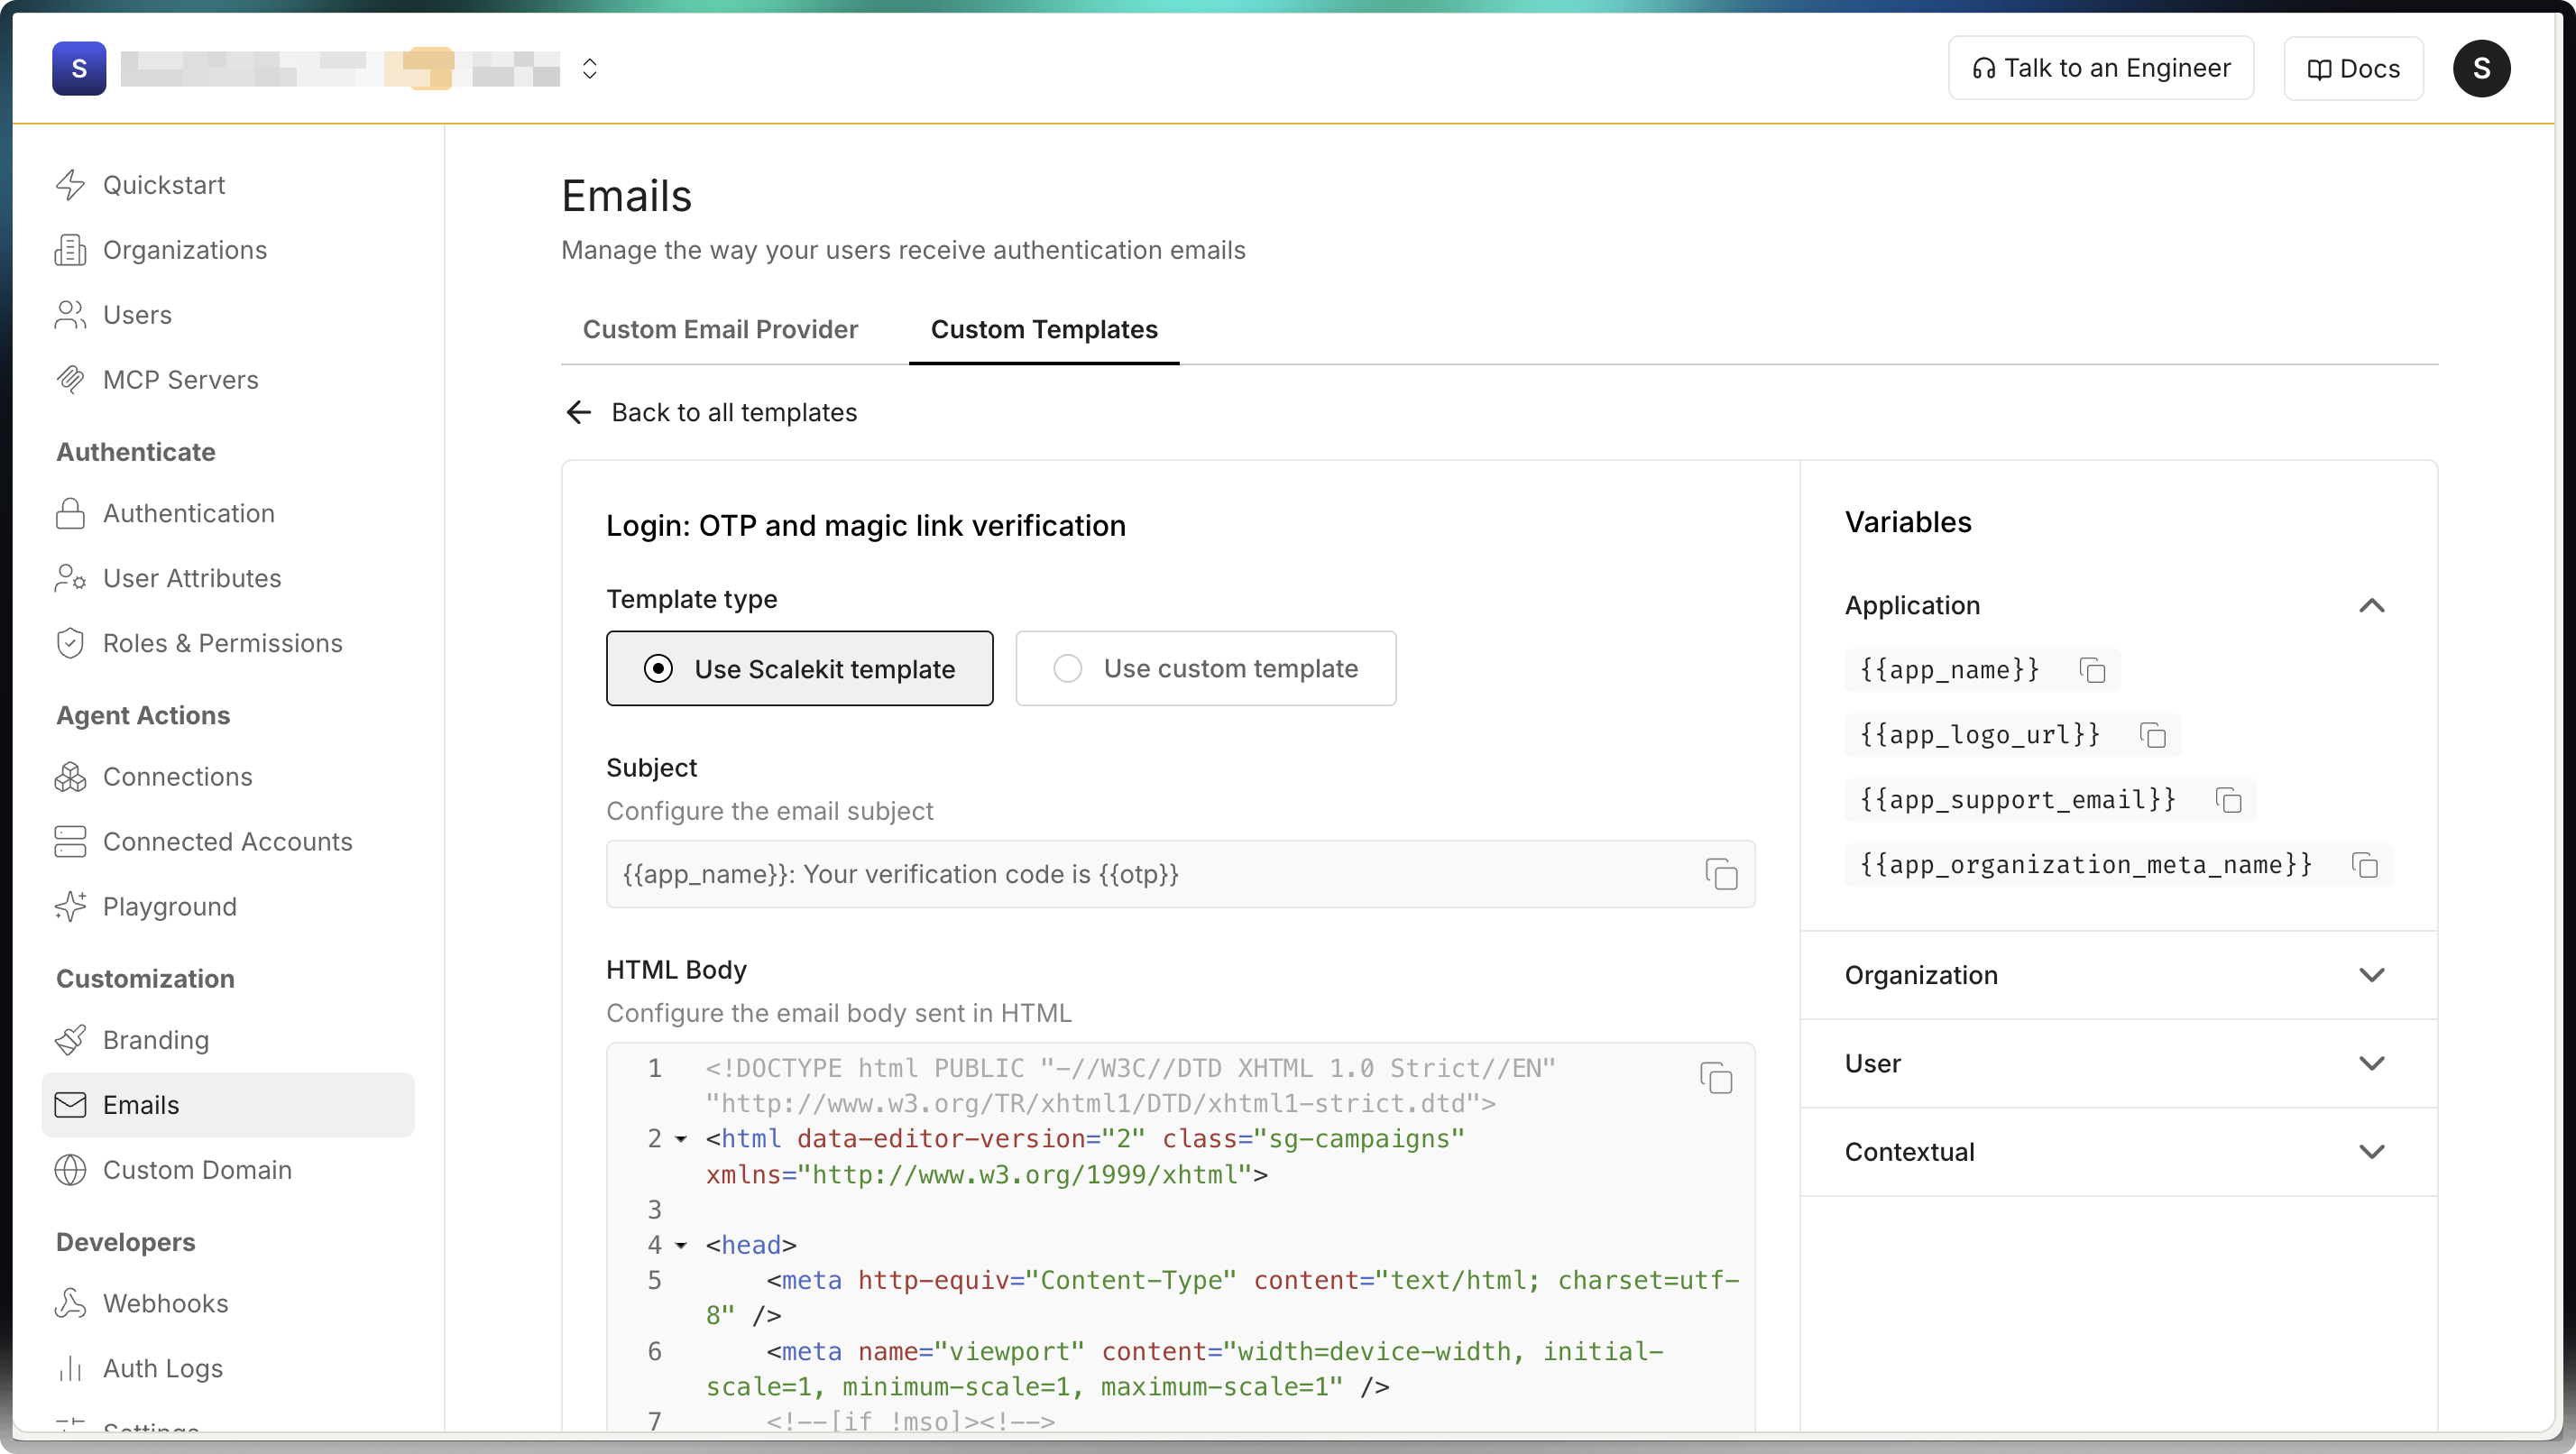
Select how each email is generated:
- Use Scalekit template: Preview subject and bodies; you cannot edit them. Emails use Scalekit’s default content.
- Use custom template: Edit the subject, HTML body, and plain text body. Your saved content is used for future sends. Requires you to bring your own email provider.
Provide HTML and plain text versions
Section titled “Provide HTML and plain text versions”Provide both versions of your email body in the template editor. When both are present, Scalekit sends a multipart/alternative message: HTML is shown in capable clients, and the plain text part is used as a fallback where HTML is not supported.
Once saved, all subsequent emails will use your customized templates.
Built-in template variables
Section titled “Built-in template variables”Use these built-in variables in your templates. Values are injected at send time. The variables below apply to all Scalekit templates.
Application
Section titled “Application”Use application variables to include app-level data (for example, name, logo, support email) that stays the same across all emails for your app.
| Variable | Description |
|---|---|
{{app_name}} | Your application name |
{{app_logo_url}} | Public URL to your application logo |
{{app_support_email}} | Support email address for your application |
{{app_organization_meta_name}} | Organization display name configured in Scalekit |
Organization
Section titled “Organization”Organization variables describe the organization that the user belongs to and are consistent across emails for that organization.
| Variable | Description |
|---|---|
{{organization_name}} | The organization name |
User variables personalize the email for the recipient (for example, name and email).
| Variable | Description |
|---|---|
{{user_name}} | The recipient’s name |
{{user_email}} | The recipient’s email address |
Contextual
Section titled “Contextual”Contextual variables apply only to the current template. They change per template or send (for example, OTP, magic link, or expiry). For example, {{link}} is maybe the same label in both sign up and log in scenarios using magic link.
| Variable | Description |
|---|---|
{{link}} | Authentication link (magic link or sign up) |
{{otp}} | One-time passcode for the current request |
{{expiry_time_relative}} | Human-readable relative date format (for example, “14 days, 6 hours, 50 min”) |
JET template syntax
Section titled “JET template syntax”Custom email templates use JET (Just Enough Templates) syntax for dynamic content. JET provides powerful templating features including conditionals, loops, and filters.
Here are two common patterns you can use in your email templates:
{{ if user_name }}  <p>Hello {{ user_name }},</p>{{ else }}  <p>Hello,</p>{{ end }}
<p>Welcome to {{ app_name }}!</p>
{{ if organization_name }} <p>You have been invited to join {{ organization_name }} organization in {{ app_name }}.</p>{{ else }} <p>You have been invited to {{ app_name }}.</p>{{ end }}Inject you own variables at runtime Passwordless
Section titled “Inject you own variables at runtime ”For more advanced personalization, you can use template variables to include values programatically in the emails. You must be using the Passwordless Headless API for authentication.
- Each variable must be a key-value pair.
- Maximum of 30 variables per template.
- All template variables must have corresponding values in the request.
- Avoid using reserved names:
otp,expiry_time_relative,link,expire_time,expiry_time.
-
Create your email template with variables:
Example email template <p>Hello {{ first_name }},</p><p>Welcome to {{ company_name }}.</p><p>Find your onboarding kit: {{ onboarding_resources }}</p> -
Include variable values in your authentication request:
Authentication request const sendResponse = await scalekit.passwordless.sendPasswordlessEmail("<john.doe@example.com>",{templateVariables: {first_name: "John",company_name: "Acme Corp",onboarding_resources: "https://acme.com/onboarding"}}); -
The sent email will include the replaced values:
Example email preview Hello John,Welcome to Acme Corp.Find your onboarding kit: https://acme.com/onboarding
Test your knowledge with a quiz
Which choice requires using your own email provider?